Building a Data Science Platform for R&D, Part 2 - Deploying Spark on AWS using Flintrock
Posted on Thu 18 August 2016 in data-science

Part 1 in this series of blog posts describes how to setup AWS with some basic security and then load data into S3. This post walks-through the process of setting up a Spark cluster on AWS and accessing our S3 data from within Spark.
A key part of my vision for a Spark-based R&D platform is being able to to launch, stop, start and then connect to a cluster from my laptop. By this I mean that I don’t want to have to directly interact with AWS every time I want to switch my cluster on or off. Versions of Spark prior to v2 had a folder in the home directory, /ec2, containing scripts for doing exactly this from the terminal. I was perturbed to find this folder missing in Spark 2.0 and ‘Amazon EC2’ missing from the ‘Deploying’ menu of the official Spark documentation. It appears that these scripts have not been actively maintained and as such they’ve been moved to a separate GitHub repo for the foreseeable future. I spent a little bit of time trying to get them to work, but ultimately they do not support v2 of Spark as yet. They also don’t allow you the flexibility of choosing which version of Hadoop to install along with Spark and this can cause headaches when it comes to accessing data on S3 (a bit more on this later).
I’m very keen on using Spark 2.0 so I needed an alternative solution. Manually firing-up VMs on EC2 and installing Spark and Hadoop on each node was out of the question, as was an ascent of the AWS DevOps learning-curve required to automate such a process. This sort of thing is not part of my day-job and I don’t have the time otherwise. So I turned to Google and was very happy to stumble upon the Flintrock project on GitHub. Its still in its infancy, but using it I managed to achieve everything I could do with the old Spark ec2 scripts, but with far greater flexibility and speed. It is really rather good and I will be using it for Spark cluster management.
Download Spark Locally
In order to be able to send jobs to our Spark cluster we will need a local version of Spark so we can use the spark-submit command. In any case, its useful for development and learning as well as for small ad hoc jobs. Download Spark 2.0 here and choose ‘Pre-built for Hadoop 2.7 and later’. My version lives in /applications and I will assume that yours does too. To check that everything is okay, open the terminal and make Spark-2.0.0 your current directory. From here run,
$ ./bin/spark-shell
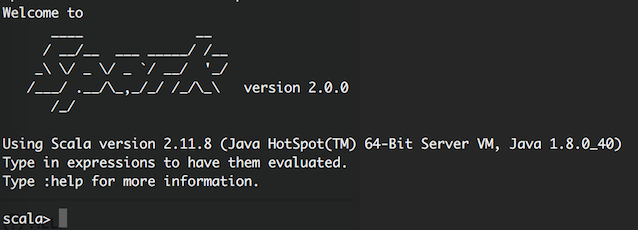
If everything is okay you should be met with the Spark shell for Scala interaction:
Install Flintrock
Exit the Spark shell (ctrl-d on a Mac, just in case you didn’t know…) and return to Spark’s home directory. For convenience, I’m going to download Flintrock to here as well - where the old ec2 scripts used to be. The steps for downloading the Flintrock binaries - taken verbatim from the Flinkrock repo’s README - are as follows:
$ flintrock_version="0.5.0"

$ curl --location --remote-name "https://github.com/nchammas/flintrock/releases/download/v$flintrock_version/Flintrock-$flintrock_version-standalone-OSX-x86_64.zip"
$ unzip -q -d flintrock "Flintrock-$flintrock_version-standalone-OSX-x86_64.zip"
$ cd flintrock/
And test that it works by running,
$ ./flintrock --help
It’s worth familiarizing yourself with the available commands. We’ll only be using a small sub-set of these, but there’s a lot more you can do with Flintrock.
Configure Flintrock
The configuration details of the default cluster are kept in a YAML file that will be opened in your favorite text editor if you run
$ ./flintrock configure
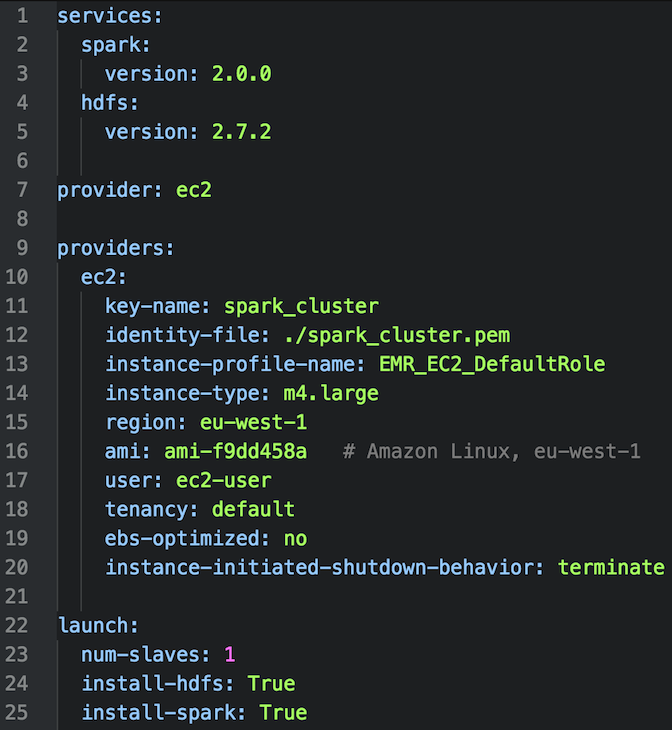
Most of these are the default Flintrock options, but a few of them deserve a little more discussion:
-
key-nameandidentity-file- in Part 1 we generated a key-pair to allow us to connect remotely to EC2 VMs. These options refer to the name of the key-par and the path to the file containing our private key. -
instance-profile-name- this assigns an IAM ‘role’ to each node. A role is a like an IAM user that isn’t a person, but can have access policies attached to it. Ultimately, this determines what out Spark nodes can and cannot do on AWS. I have chosen the default role that EMR assigns to nodes, which allows them to access data held in S3. -
instance-type- I think running 2 x m4.large instances is more than enough for testing a Spark cluster. In total, this gets you 4 cores, 16Gb of RAM and Elastic Block Storage (EBS). The latter is important as it means your VMs will ‘persist’ when you stop them - just like shutting-down your laptop. Check that the overall pricing is acceptable to you here. If it isn’t, then choose another instance type, but make sure it has EBS (or add it separately if you need to). -
region- the AWS region that you want the cluster to be created in. I’m in the UK so my default region is Ireland (aka eu-west-1). -
ami- which Amazon Machine Image (AMI) should the VMs in our cluster be based on? For the time-being I’m using the latest version of Amazon’s Linux distribution, which is based on Red Hat Linux and includes AWS tools. Be aware that this has its idiosyncrasies (deviations from what would be expected on Red Hat and CentOS), and that these can create headaches (some of which I encountered when I was trying to get the Apache Zeppelin daemon to run). It is free and easy, however, and the ID for the latest version can be found here. -
user- the setup scripts will create a non-root user on each VM and this will be the associated username. -
num-slaves- the number of non-master Spark nodes - 1 or 2 will suffice for testing. -
install-hdfs- should Hadoop be installed on each machine alongside Spark? We want to access data in S3 and Hadoop is also a convenient way of making files and JARs visible to all nodes. So it’s a ‘True’ for me.
Launch Cluster
Once you’ve decided on the cluster’s configuration, head back to the terminal and launch a cluster using,
$ ./flintrock launch the_name_of_my_cluster
This took me under 3 minutes, which is an enormous improvement on the old ec2 scripts. Once Flintrock issues it’s health report and returns control of the terminal back to you, login to the AWS console and head over to the EC2 page to see the VMs that have been created for you:

Select the master node to see it’s details and check that the correct IAM role has been added:

Note that Flintrock has created two security groups for us: flintrock-your_cluster_name-cluster and flintrock. The former allows each node to connect with every other node, and the latter determines who can connect to the nodes from the ‘outside world’. Select the ‘flintrock’ security group:
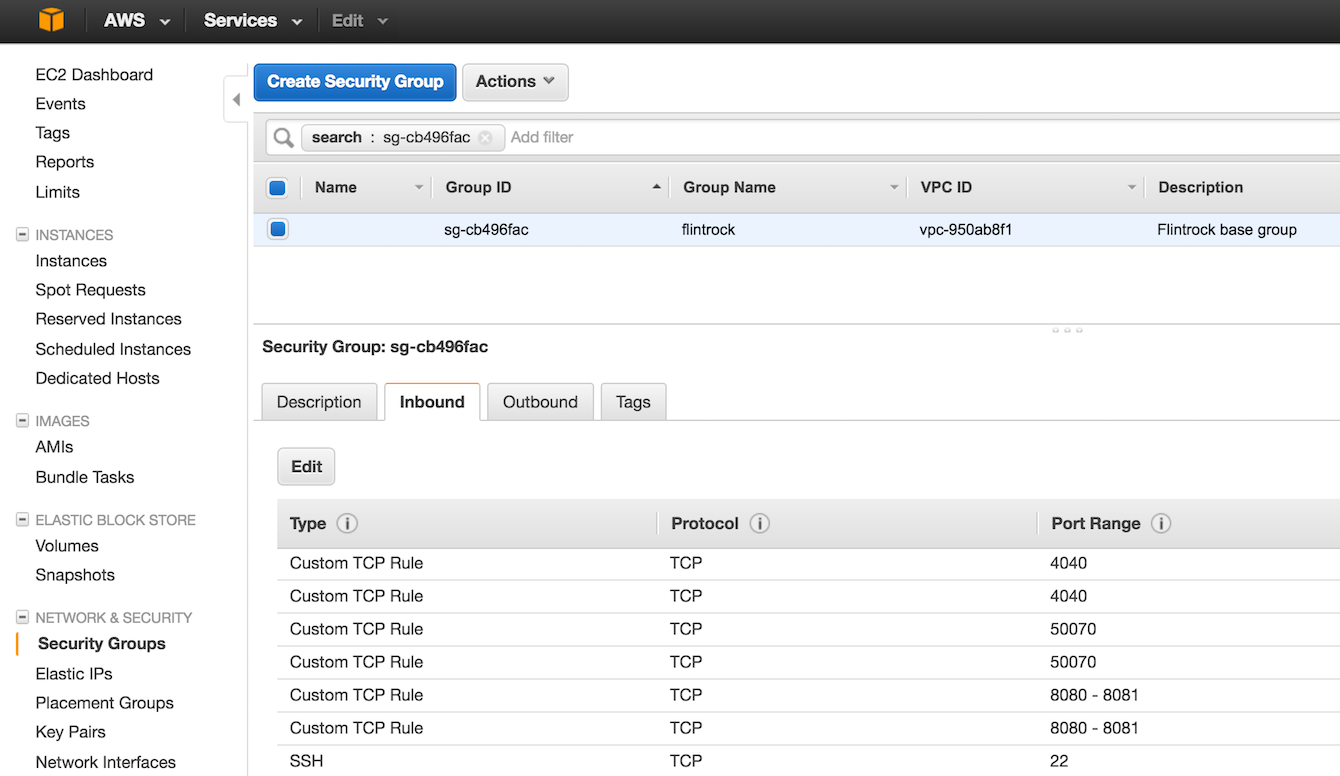
The Sources are the IP addresses allowed to access the cluster. Initially, this should be set to the IP address of the machine that has just created your cluster. If you are unsure what you IP address is, then try whatismyip.com. The ports that should be open are:
- 4040 - allows you to connect to a Spark application’s web UI (e.g. the spark-shell or Zeppelin, etc.),
- 8080 & 8081 - the Spark master node’s web UI and a free port that we’ll use for Apache Zeppelin when we set that up later on (in the final post of this series),
- 22 - the default port for connecting via SSH.
Edit this list and add another Custom TCP rule to allow port 8787 to be accessed by your IP address. We will use this port to connect to R Studio when we set that up in the next post in this series.
Connect to Cluster
Find the Public IP address of the master node from the Instances tab of the EC2 Dashboard. Enter this into a browser followed by :8080, which should allow us to access the Spark master node’s web UI:

If everything has worked correctly then you should see one worker node registered with the master.
Back on the Instances tab, select the master node and hit the connect button. You should be presented with all the information required for connecting to the master node via SSH:
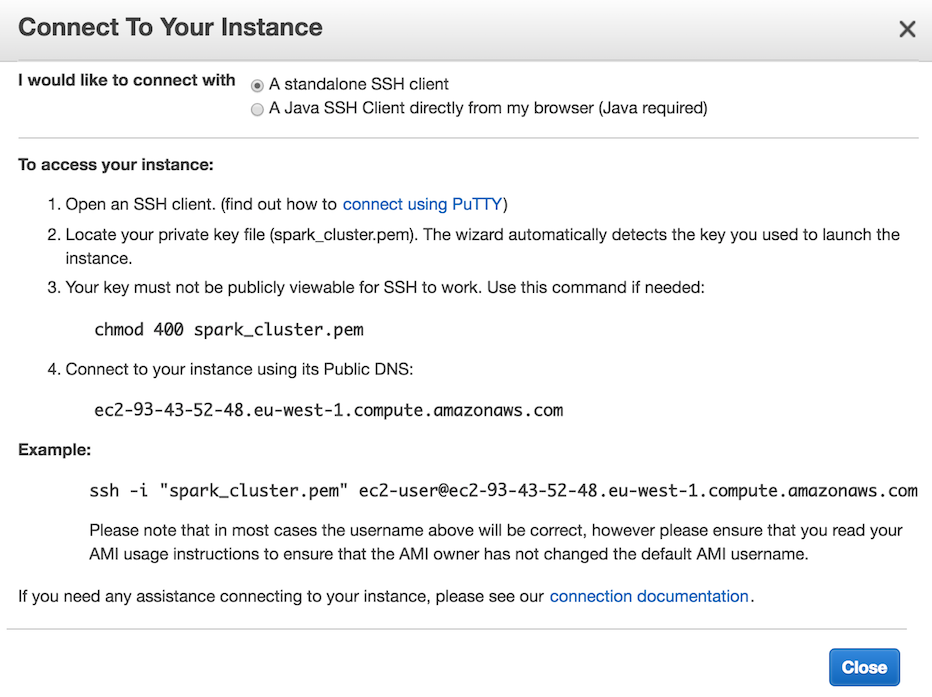
Return to the terminal and follow this advice. If successful, you should see something along the lines of:
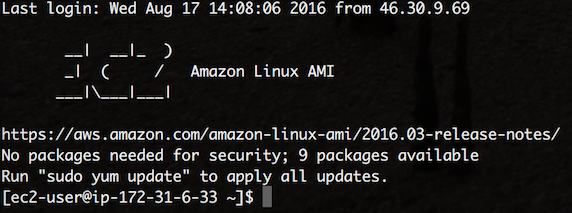
Next, fire-up the Spark shell for Scala by executing spark-shell. To run a trivial job across all nodes and test the cluster, run the following program on a line-by-line basis:
val localArray = Array(1,2,3,4,5)
val rddArray = sc.parallelize(localArray)
val rddArraySum = rddArray.reduce((x, y) => x + y)
If no errors were thrown and the shell’s final output is,
rddArraySum: Int = 15
then give yourself a pat-on-the-back as you’ve just executed your first distributed computation on a cloud-hosted Spark cluster.
There are two ways we can send a complete Spark application - a JAR file - to the cluster. Firstly, we could copy our JAR to the master node - let’s assume it’s the Apache Spark example application that computes Pi to n decimal places, where n is passed as an argument to the application. In this instance, we could SSH into the master node as we did for the Spark shell and then execute Spark in ‘client’ mode,
$ spark/bin/spark-submit --master spark://ip-172-31-6-33:7077 --deploy-mode client --class org.apache.spark.examples.SparkPi spark/examples/jars/spark-examples_2.11-2.0.0.jar 10
Note that the --master option takes the local IP address of the master node within our network in AWS. An alternative method is to send our JAR file directly from our local machine using Spark in ‘cluster’ mode,
$ bin/spark-submit --master spark://52.48.93.43:6066 --deploy-mode cluster --class org.apache.spark.examples.SparkPi examples/jars/spark-examples_2.11-2.0.0.jar 10
A common pattern is to use the latter when the application both reads data and writes output to and from S3 or some other data repository (or database) in our AWS network. I have not had any luck running an application on the cluster from my local machine in ‘client’ mode. I haven’t been able to make the master node ‘see’ my laptop - pinging the latter from the former always fails and in client mode the Spark master node must be able to reach the machine that is running the driver application (which in client mode, in this context, is my laptop). I’m sure that I could circumnavigate this issue if I setup a VPN or an SSH-tunnel between my laptop and the AWS cluster, but this seem like more hassle than it’s worth considering that most of my interaction with Spark will be via R Studio or Zeppelin that I will setup to access remotely.
Read S3 Data from Spark
In order to access our S3 data from Spark (via Hadoop), we need to make a couple of packages (JAR files and their dependencies) available to all nodes in our cluster. The easiest way to do this, is to start the spark-shell with the following options:
$ spark-shell --packages com.amazonaws:aws-java-sdk-pom:1.10.34,org.apache.hadoop:hadoop-aws:2.7.2
Once the cluster has downloaded everything it needs and the shell has started, run the following program that ‘opens’ the README file we uploaded to S3 in Part 1 of this series of blogs, and ‘collects’ it back to the master node from its distributed (RDD) representation:
val data = sc.textFile("s3a://alex.data/README.md")
data.collect
If everything is successful then you should see the contents of the file printed to screen.
If you have read elsewhere about accessing data on S3, you may have seen references made to connection strings that start with "s3n://... or maybe even "s3://... with accompanying discussions about passing credentials either as part of the connection string or by setting system variables, etc. Because we are using a recent version of Hadoop and the Amazon packages required to map S3 objects onto Hadoop, and because we have assigned our nodes IAM roles that have permission to access S3, we do not need to negotiate any of these (sometimes painful) issues.
Stopping, Starting and Destroying Clusters
Stopping a cluster - shutting it down to be re-started in the state you left it in - and preventing any further costs from accumulating is as simple as asking Flintrock to,
$ ./flintrock stop the_name_of_my_cluster
and similarly for starting and destroying (terminating the cluster VMs and their state’s forever),
$ ./flintrock start the_name_of_my_cluster
$ ./flintrock destroy the_name_of_my_cluster
Be aware that when you restart a cluster the public IP addresses for all the nodes will have changed. This can be a bit of a (minor) hassle, so I have opted to create an Elastic IP address and assign it to my master node to keep it’s public IP address constant over stops and restarts (for a nominal cost). To see what clusters are running at any one moment in time,
$ ./flintrock describe
We are now ready to install R, R Studio and start using Sparklyr and/or SparkR to start interacting with our data (Part 3 in this series of blogs).